> For the complete documentation index, see [llms.txt](https://docs.pulseinsights.com/llms.txt). Markdown versions of documentation pages are available by appending `.md` to page URLs; this page is available as [Markdown](https://docs.pulseinsights.com/configuring-pulse-insights-console/editor/survey-groups-localization.md).
# Survey Groups (Localization)
Survey Groups allow you to create multiple similar surveys and organize them together.
For example, if you want to create the same survey (with similar questions and branching) in other markets in a localized language, or if you’d like to run an A/B test and easily keep track and compare results, you can group all of the survey “variants” in a Survey Group.
You can view results of each survey instance individually, and also see the aggregated results for the survey group as a collective whole.
To create a Survey Group, you first need to create a base survey. Create a survey as you normally would. After creating the first survey, you can create a survey group from the main dashboard page. The survey you originally created will be your “base” survey and will serve as the template for the other surveys you create in the group.
Hover on the survey in the survey index dashboard, click the dropdown menu and choose "Create Group"
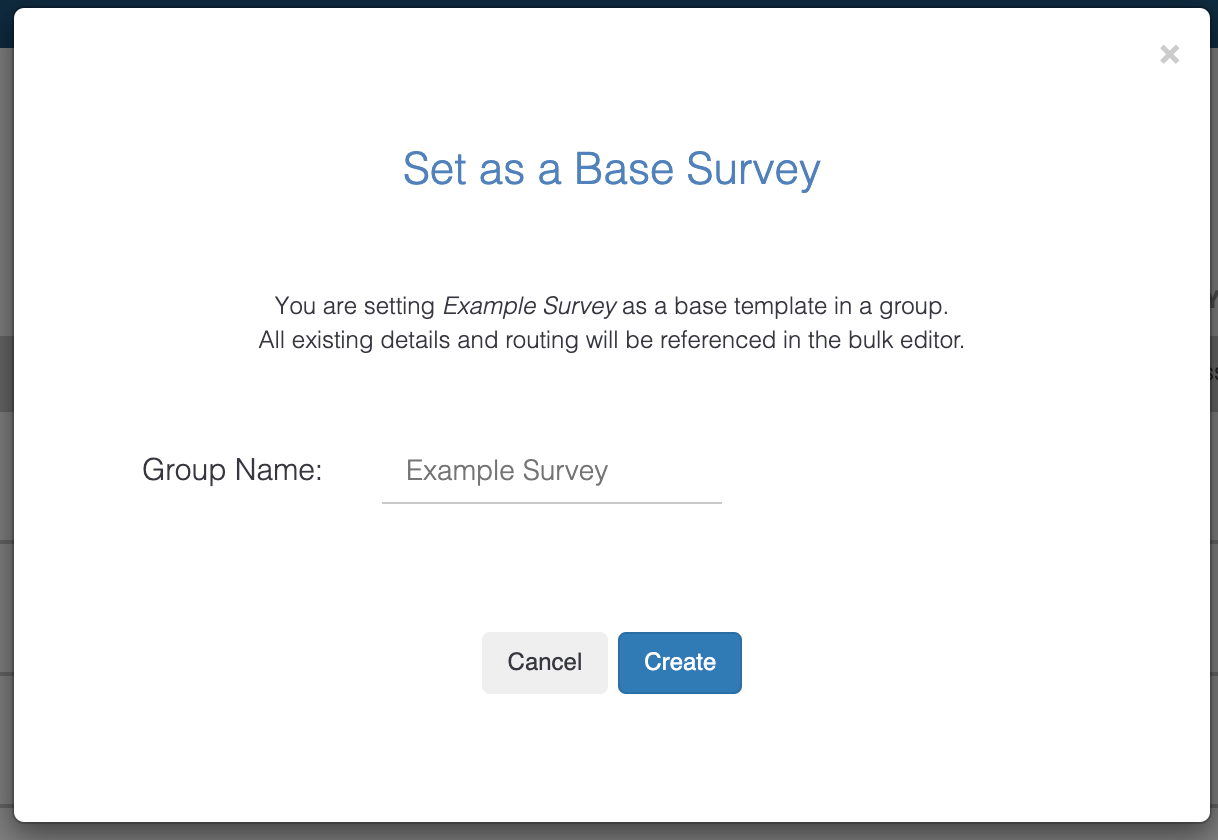
When you click “Create Group”, you will be prompted to name your survey group.
Once you click “Create”, then your new group will be created and you will be brought to the Bulk Editor where you can create additional variants of the base survey.
### Bulk Editor
For an existing survey group, you can access the Bulk Editor via the Survey dashboard by hovering over the survey group name, clicking on the options menu and selecting "Bulk Editor".
The Bulk Editor presents the survey attributes in a spreadsheet-like format, so that it is easier to make consistent changes across all surveys in the survey group.
This view lists survey information, such as:
* General (survey name, status, goal)
* Widget type
* Targeting conditions
* Question type
* Question and answer copy
* Thank you message copy
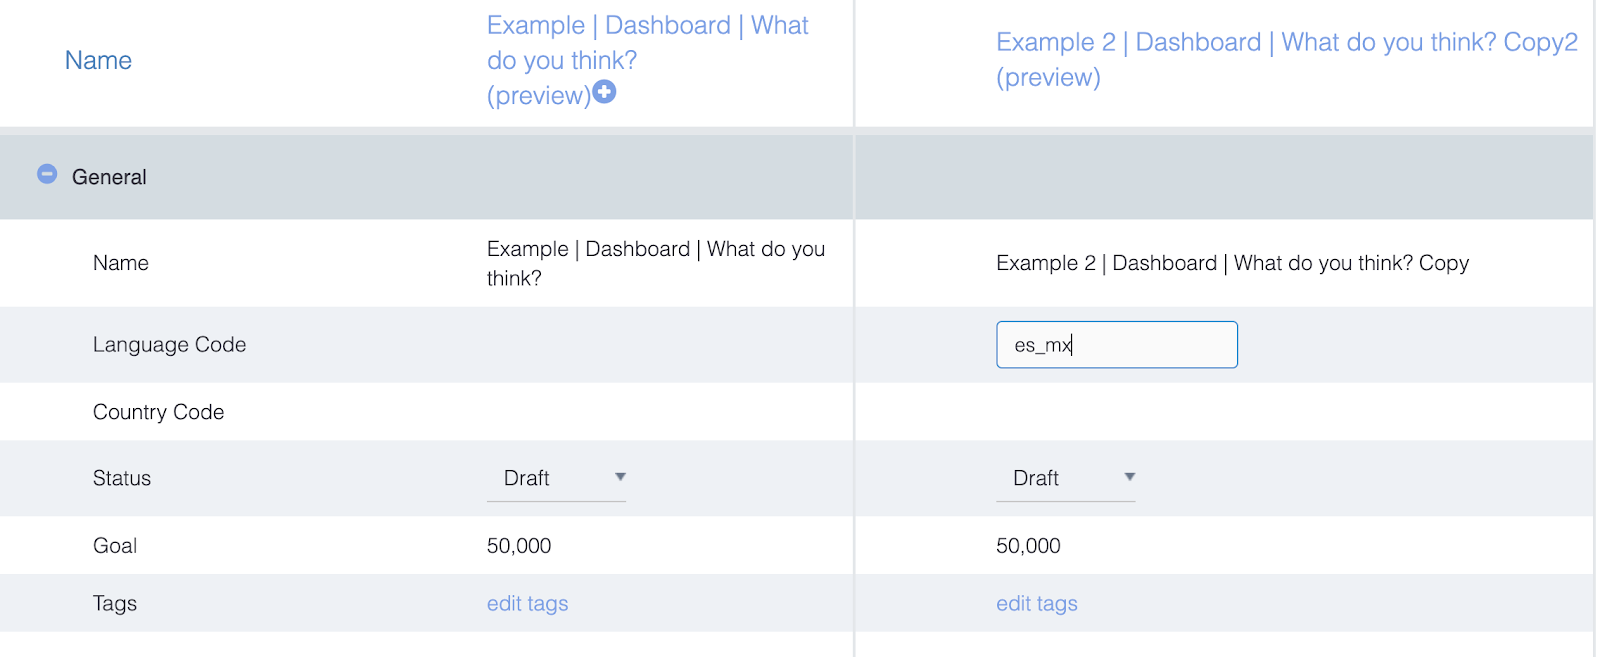
The first column consists of the row headlines (with short names/labels that are editable by double clicking on the value) and the base survey (the original survey you created and created a survey group from). The base survey column and the top row of survey names will be locked in view as you scroll (up/down/left/right) and edit so that you can easily reference the base survey and survey names while you are making edits to the survey duplicates.
**To create a new survey variant:** click on the “+” button next to the base survey name. An exact copy of the survey will be created and its attributes will be listed in the next column of the spreadsheet-view.
**To edit copy:** double click on the text input field, type the new copy, then hit the Enter key.
{% hint style="info" %}
Any changes made in the bulk editor are automatically saved (there is no "Save" button. Because of this, you cannot edit surveys with a "Live" status in the bulk editor. You must first change the survey's status from "Live" to any other status via the Status dropdown menu. We recommend QA-ing any changes before setting surveys live.
{% endhint %}
**To edit options** (such as status, widget type, theme, etc)**:** click on the dropdown menu and select another option.
**Translations:** Enter the language code (see [here](http://www.lingoes.net/en/translator/langcode.htm) for ISO Language Codes) in the appropriate text field in the “General” section. When you enter your translated copy, hover over the globe icon to reveal a tooltip with the approximate English translation. This tool comes in handy when you are creating survey variants in different languages.
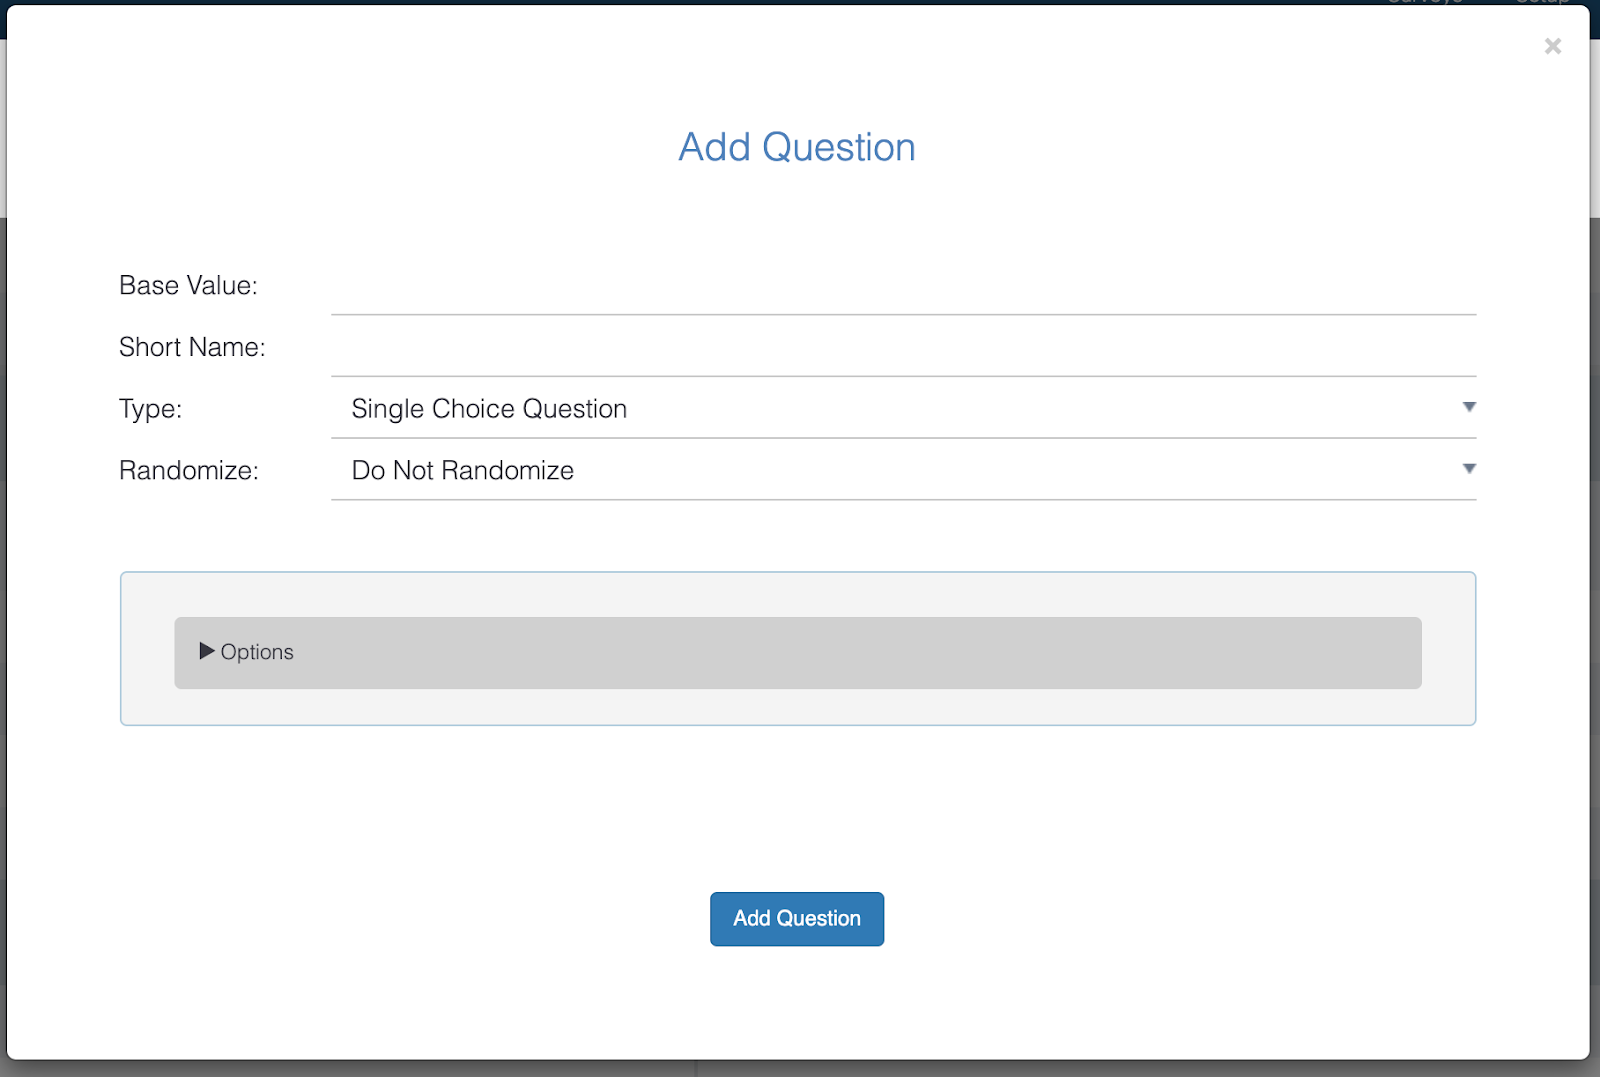
**To add questions:** Scroll down to the bottom of the page and click on the “Add Question” button on the bottom left. This will trigger the “Add Question” modal where you can pick the question type and define the question copy and short name label. You can also configure additional options, which vary depending on the question type.
{% hint style="info" %}
When you add a new question in the bulk editor, a new question will be added for ALL survey variants within the group.
{% endhint %}
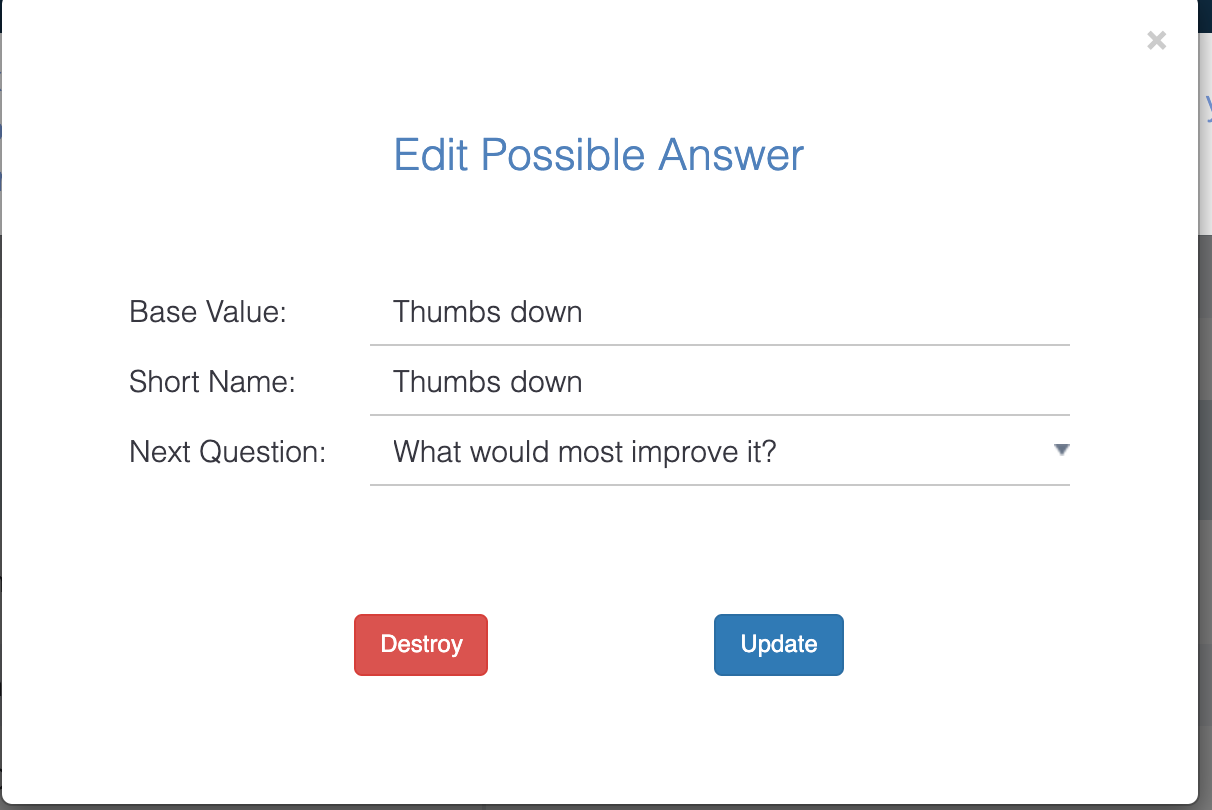
**To branch/ask a followup question:** Double click on the short name question or answer in the first column. A modal will pop up where you can choose a followup question from the dropdown menu. In this modal, you can also change the base value and the short name. Then hit “Update”
**To add an answer:** Click on the “+add answer” button in the first column.
{% hint style="info" %}
This will add an answer for all survey variants.
{% endhint %}
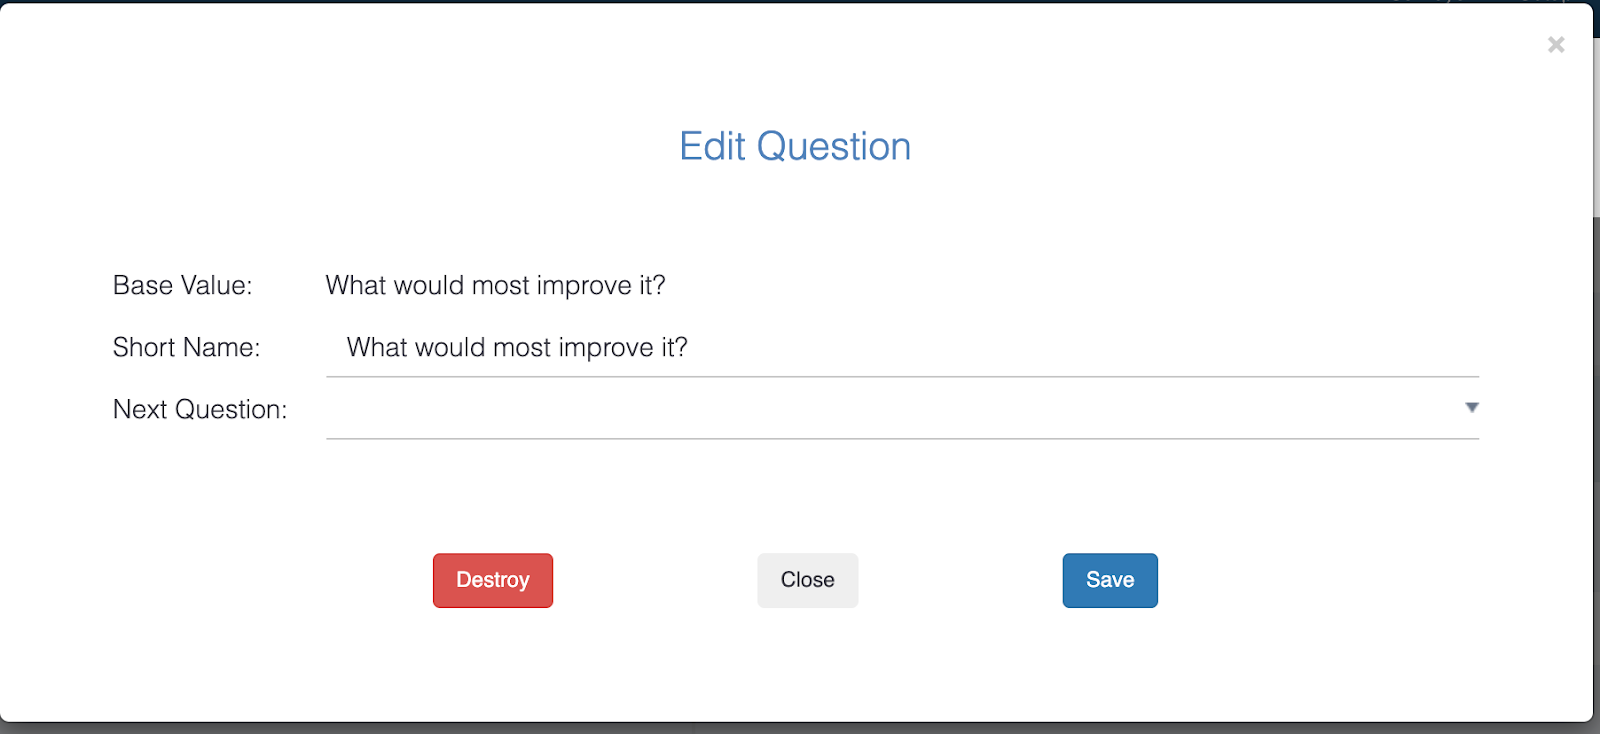
**To delete a question:** Double click on the question in the first column to trigger the “Edit Question” modal. Click “Destroy” to delete the question for *all surveys*.
**To edit a question:** You can also edit the base question copy and short name in the “Edit Question” modal, which you can open by double clicking the question in the first column. To ask a follow up question, select a question from the dropdown menu. Note, you will have to create the followup question before it will be included in the dropdown menu.
**To delete an answer:** Double click on the short name answer in the first column to pull up the “Edit Possible Answer” modal. Click on the “Destroy” button to delete the answer for the base survey for all the survey variants.
{% hint style="info" %}
To help you keep track of any differences between survey (e.g. translated copy or survey settings), components of the survey variants that differ from the base survey will have an icon to callout any differences.
{% endhint %}
Example of the survey variant has a different value than the base survey with the informative icon to note a difference.
---
# Agent Instructions
This documentation is published with GitBook. GitBook is the documentation platform designed so that both humans and AI agents can read, navigate, and reason over technical content effectively. Learn more at gitbook.com.
## Querying This Documentation
If you need additional information that is not directly available in this page, you can query the documentation dynamically by asking a question.
Perform an HTTP GET request on the current page URL with the `ask` query parameter, and the optional `goal` query parameter:
```
GET https://docs.pulseinsights.com/configuring-pulse-insights-console/editor/survey-groups-localization.md?ask=&goal=
```
`ask` is the immediate question: it should be specific, self-contained, and written in natural language.
`goal` is optional and describes the broader end goal you are ultimately trying to accomplish on behalf of the user. GitBook uses it to tailor the answer towards what is most useful for that goal.
The response will contain a direct answer to the question and relevant excerpts and sources from the documentation.
Use this mechanism when the answer is not explicitly present in the current page, you need clarification or additional context, or you want to retrieve related documentation sections.